Wednesday, August 7, 2013

Posted by Chris Banes, Android Developer Relations


Following on the Android 4.3 and Nexus 7 announcements, we recently released two important tools to help you build beautiful apps that follow Android Design best practices:


  • We released a new backward-compatible Action Bar implementation called ActionBarCompat that's part of the Support Library r18. The ActionBarCompat APIs let you build the essential Action Bar design pattern into your app, with broad compatibility back to Android 2.1.


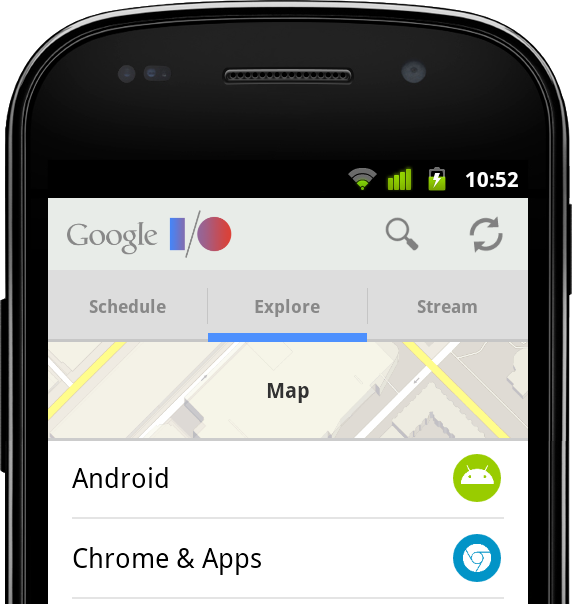
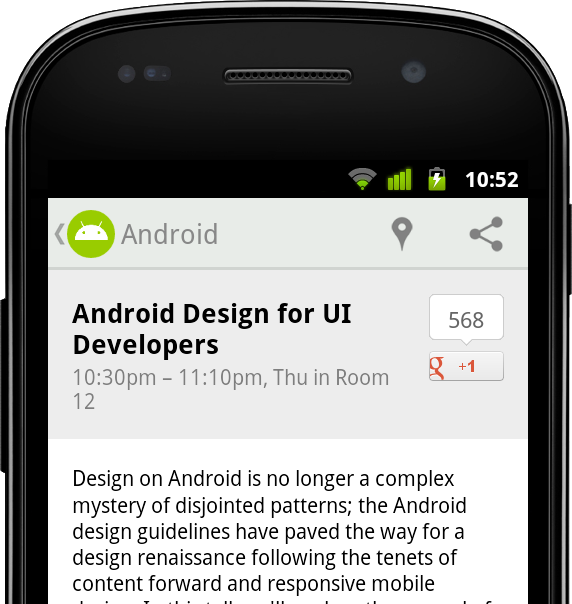
  • We released the full source code for the I/O 2013 app, which gives you working examples of ActionBarCompat, responsive design for phones and tablets, Google+ sign-in, synchronized data kept fresh through Google Cloud Messaging, livestreaming using the YouTube Android Player API, Google Maps API v2, and much more.
    All of the app code and resources are available for you to browse or download, and it's all licensed under Apache License 2.0/Creative Commons 3.0 BY so you can reuse it in your apps. You can get the source at code.google.com/p/iosched


This post helps you get started with ActionBarCompat, from setting up the Support Library to adding an Action Bar to your UI. If you want to see ActionBarCompat in action first, download the I/O 2013 app from Google Play and give it a try. The app's Action Bar is built using the ActionBarCompat and served as our main test environment for making sure the APIs work properly, with full compatibility across platform versions.


Getting Started with ActionBarCompat


ActionBarCompat is a new API in the Android Support Library that allows you to add an Action Bar to applications targeting minSdkVersion 7 or greater. The API and integration have been designed to closely mirror the existing framework APIs, giving you an easy migration path for your existing apps.


If you've already using another implementation of Action Bar in your app, you can choose whether to ActionBarCompat. If you’re using the old ActionBarCompat sample available through the SDK, then we highly recommend that you upgrade to the new ActionBarCompat API in the Support Library. If you’re using a third-party solution (such as ActionBarSherlock), there are a few reasons to consider upgrading:


ActionBarSherlock is a solid and well-tested library which has served
developers very well for a long time. If you are already using it and do not
currently require any of the above then there is no need to migrate.


If you are ready to get started with ActionBarCompat, the sections below take you through the process.


1. Add ActionBarCompat as a project dependency


ActionBarCompat is distributed as both a Gradle artifact and a library project. See Setting Up the Support Library for more information.


2. Update your style resources


The first thing to update are your Activity themes so they use a Theme.AppCompat theme. If you're currently using one of the Theme.Holo themes then just replace this with the related Theme.AppCompat theme. For instance if you have the following in your AndroidManifest.xml:


<activity
...
android:theme="@android:style/Theme.Holo" />


You would change it to:


<activity
...
android:theme="@style/Theme.AppCompat" />


Things get more tricky when you have a customized theme. The first thing to do is change your base theme to one of the Theme.AppCompat themes, like above.


If you have customized styles for the Action Bar (and related widgets) then you must also change these styles to extend from the Widget.AppCompat version. You also need to double-set each attribute: once in the Android namespace and again with no namespace (the default namespace).


For example, in the following example we have a custom theme which extends from Theme.Holo.Light, which references a custom Action Bar style.


<style name="Theme.Styled" parent="@android:style/Theme.Holo.Light">
<item name="android:actionBarStyle">@style/Widget.Styled.ActionBar</item>
</style>

<style name="Widget.Styled.ActionBar"
parent="@android:style/Widget.Holo.Light.ActionBar">
<item name="android:background">@drawable/ab_custom_solid_styled</item>
<item name="android:backgroundStacked"
>@drawable/ab_custom_stacked_solid_styled</item>
<item name="android:backgroundSplit"
>@drawable/ab_custom_bottom_solid_styled</item>
</style>


To make this work with AppCompat you would move the above styles into the values-v14 folder, modifying each style's parent to be an AppCompat version.


<style name="Theme.Styled" parent="@style/Theme.AppCompat.Light">
<!-- Setting values in the android namespace affects API levels 14+ -->
<item name="android:actionBarStyle">@style/Widget.Styled.ActionBar</item>
</style>

<style name="Widget.Styled.ActionBar" parent="@style/Widget.AppCompat.Light.ActionBar">
<!-- Setting values in the android namespace affects API levels 14+ -->
<item name="android:background">@drawable/ab_custom_solid_styled</item>
<item name="android:backgroundStacked"
>@drawable/ab_custom_stacked_solid_styled</item>
<item name="android:backgroundSplit"
>@drawable/ab_custom_bottom_solid_styled</item>
</style>


You would then need add the following into the values folder:


<style name="Theme.Styled" parent="@style/Theme.AppCompat.Light">
<!-- Setting values in the default namespace affects API levels 7-13 -->
<item name="actionBarStyle">@style/Widget.Styled.ActionBar</item>
</style>

<style name="Widget.Styled.ActionBar" parent="@style/Widget.AppCompat.Light.ActionBar">
<!-- Setting values in the default namespace affects API levels 7-13 -->
<item name="background">@drawable/ab_custom_solid_styled</item>
<item name="backgroundStacked">@drawable/ab_custom_stacked_solid_styled</item>
<item name="backgroundSplit">@drawable/ab_custom_bottom_solid_styled</item>
</style>


3. Modify Menu resources


As with the standard Action Bar in Android 3.0 and later versions, action items are added via the options menu. The difference with ActionBarCompat is that you need to modify your Menu resource files so that any action item attributes come from ActionBarCompat's XML namespace.


In the example below you can see that a new "yourapp" namespace has been added to the menu element, with the showAsAction and actionProviderClass attributes being provided from this namespace. You should also do this for the other action item attributes (actionLayout and actionViewClass) if you use them.


<menu xmlns:yourapp="http://schemas.android.com/apk/res-auto"
xmlns:android="http://schemas.android.com/apk/res/android">

<item
android:id="@+id/menu_share"
android:title="@string/menu_share"
yourapp:actionProviderClass="android.support.v7.widget.ShareActionProvider"
yourapp:showAsAction="always" />
...
</menu>


4. Extend Activity classes from ActionBarCompat


ActionBarCompat contains one Activity class which all of your Activity classes should extend: ActionBarActivity.


This class itself extends from FragmentActivity so you can continue to use Fragments in your application. There is not a ActionBarCompat Fragment class that you need to extend, so you should continue using android.support.v4.Fragment as the base class for your Fragments.


5. Add Menu callbacks


To display items on the Action Bar, you need to populate it by overriding onCreateOptionsMenu() and populating the Menu object. The best way to do this is by inflating a menu resource. If you need to call any MenuItem methods introduced in API level 11 or later, you need to call the shim for that method in MenuItemCompat instead. Here's an example:


@Override
public boolean onCreateOptionsMenu(Menu menu) {
// Inflate the menu
getMenuInflater().inflate(R.menu.main_menu, menu);

// Find the share item
MenuItem shareItem = menu.findItem(R.id.menu_share);

// Need to use MenuItemCompat to retrieve the Action Provider
mActionProvider = (ShareActionProvider)
MenuItemCompat.getActionProvider(shareItem);

return super.onCreateOptionsMenu(menu);
}


6. Retrieve the Action Bar


ActionBarCompat contains it’s own ActionBar class, and to retrieve the Action Bar attached to your activity you call getSupportActionBar(). The API exposed by the compatibility class mirrors that of the framework ActionBar class, allowing you to alter the navigation, show/hide it, and change how it display it’s contents.


7. Add ActionMode callbacks


To start an action mode from your ActionBarActivity simply call startSupportActionMode(), providing a callback similar to how you would with the native action mode. The following example shows how to start an action mode, inflate a menu resource and react to user’s selection:


startSupportActionMode(new ActionMode.Callback() {
@Override
public boolean onCreateActionMode(ActionMode actionMode, Menu menu) {
// Inflate our menu from a resource file
actionMode.getMenuInflater().inflate(R.menu.action_mode_main, menu);

// Return true so that the action mode is shown
return true;
}

@Override
public boolean onPrepareActionMode(ActionMode actionMode, Menu menu) {
// As we do not need to modify the menu before displayed, we return false.
return false;
}

@Override
public boolean onActionItemClicked(ActionMode actionMode, MenuItem menuItem) {
// Similar to menu handling in Activity.onOptionsItemSelected()
switch (menuItem.getItemId()) {
case R.id.menu_remove:
// Some remove functionality
return true;
}

return false;
}

@Override
public void onDestroyActionMode(ActionMode actionMode) {
// Allows you to be notified when the action mode is dismissed
}
});


Similar to the Activity class, ActionBarActivity provides two methods that you can override to be notified when an action mode is started/finished from within your Activity (including attached Fragments). The methods are onSupportActionModeStarted() and onSupportActionModeFinished().


8. Add support for Up navigation


Simple example


Up navigation support is built into ActionBarCompat and is similar to that provided in the Android framework in Android 4.1 and higher.


In the simplest form, you just need add a reference in each AndroidManifest <activity> element to its logical parent activity. This is done by adding a metadata element to the <activity> element. You should also set the android:parentActivityName attribute for explicit Android 4.1 support, although this is not strictly necessary for ActionBarCompat:


<activity android:name=".SampleActivity"
android:parentActivityName=".SampleParentActivity">
<meta-data android:name="android.support.PARENT_ACTIVITY"
android:value=".SampleParentActivity" />
</activity>


In your Activity you should then configure the home button to display for up navigation:


getSupportActionBar().setDisplayHomeAsUpEnabled(true);


When the user now clicks on the home item, the user will navigate up to the parent Activity set in your AndroidManifest.


Advanced calls


There are a number of methods which can be overridden to customize what happens when a user clicks on the home item. Each of the methods below replicate/proxy similarly-named methods added in Android 4.1:


  • onSupportNavigateUp()

  • supportNavigateUpTo(Intent)

  • getSupportParentActivityIntent()

  • supportShouldUpRecreateTask(Intent)

  • onCreateSupportNavigateUpTaskStack(TaskStackBuilder) and onPrepareSupportNavigateUpTaskStack(TaskStackBuilder)


Requesting Window features


When using ActionBarActivity you should call supportRequestWindowFeature() to request window features. For instance the following piece of code requests an overlay action bar:


@Override
protected void onCreate(Bundle savedInstanceState) {
super.onCreate(savedInstanceState);

// Needs to be called before setting the content view
supportRequestWindowFeature(Window.FEATURE_ACTION_BAR_OVERLAY);

// Now set the content view
setContentView(R.layout.activity_main);
...
}


Adding support for ProgressBar


Similar to the native Action Bar, ActionBarCompat supports displaying progress bars on the Action Bar. First you need to request the window feature, you then display or alter the progress bars with one of the following methods, each of which mirror functionality in the similar named method from Activity:


  • setSupportProgress()

  • setSupportProgressBarIndeterminate()

  • setSupportProgressBarVisibility()

  • setSupportProgressBarIndeterminateVisibility()


Below is an example which requests an indeterminate progress bar, and then later displays it:


@Override
protected void onCreate(Bundle savedInstanceState) {
super.onCreate(savedInstanceState);

// Needs to be called before setting the content view
supportRequestWindowFeature(Window.FEATURE_INDETERMINATE_PROGRESS);

// Now set the content view
setContentView(R.layout.activity_main);
...
// When ready, show the indeterminate progress bar
setSupportProgressBarIndeterminateVisibility(true);
}


Further Reading


The Action Bar API Guide covers a lot of what is in this post and much more. Even if you have used the Action Bar API in the past, it’s definitely worth reading to see how ActionBarCompat differs from the framework.


There are also a number of sample applications using ActionBarCompat covering how to use the library in various ways. You can find them in the “Samples for SDK” package in the SDK Manager.


Check out the video below for a quick hands-on with ActionBarCompat.


Monday, July 29, 2013

Posted by Purnima Kochikar, Director of Business Development, Games & Applications


Last week, we unveiled a number of new things in the world of Android. And while we already showcased the new tools available at your disposal in Android 4.3, we also unveiled a new Nexus 7 tablet, as well as the Google Play Games app, both of which represent opportunities to take advantage of a growing number of users.


Nexus 7 and the Android tablet revolution


If you’re a developer optimizing your app for Android tablets, no doubt you’re familiar with the original Nexus 7. It was Google’s statement on what a great Android tablet experience should look like, and since then, the Android tablet ecosystem has come a long way. There have already been more than 70 million activations of Android tablets, with more than 1 in 2 tablets sold today running Android. We’re starting to see with Android tablets what could be the hockey stick growth all of us experienced a couple of years ago with Android smartphones, and we hope that the new Nexus 7 continues to fuel this growth even further.


Most top developers on Android have already prepared their applications for this wave of new Android tablet users, including many of the essentials, like the New York Times, Zappos, Evernote, Flipboard, Pinterest and more. To help users find your tablet-designed apps more easily on Google Play, you can now choose to only see apps designed for tablets in the top lists. There are also over 50 new collections, which highlight outstanding tablet apps.


To take advantage of the Android tablet revolution, check out our Tablet App Quality Checklist, which has tips and techniques on how to deliver a great app experience for tablet users. It details all of the key things you need to do to optimize your app for tablets, like taking advantage of the extra screen real estate and adjusting font sizes and touch targets, to things you can do on the distribution side, like declaring support for tablet screens and showcasing your tablet UI on Google Play by uploading tablet-specific screenshots. Optimizing your app for Android tablets will unlock a whole new group of users, like those who are about to receive their new Nexus 7 tablets.


Taking your game to the next level


The Android games category on Google Play is on fire; in fact, the vast majority of top mobile game developers are building Android tablet games, and most new titles launch immediately on Android. To help game developers take advantage of the next generation of games, at Google I/O in May, we introduced Google Play game services, our gaming platform for Android, iOS, and the web. By building on Google’s strengths in mobile and cloud services, Google Play game services allows game developers to focus on what they’re good at: creating great gaming experiences for their users.


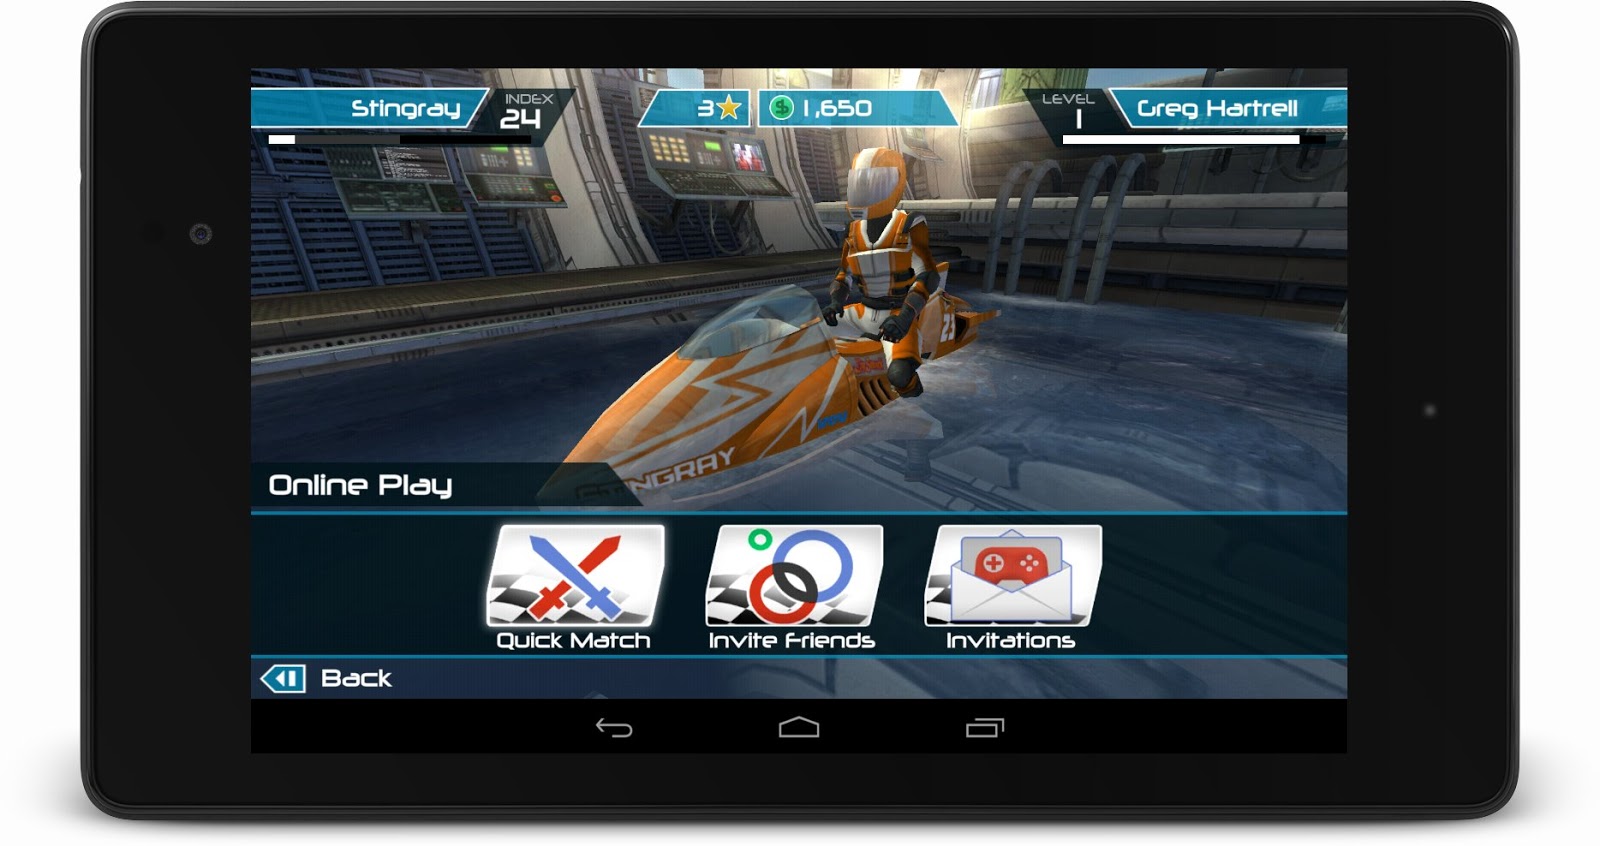
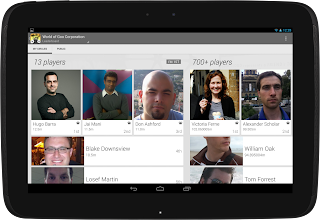
Turbocharging that growth even more, on Wednesday we introduced the Google Play Games app, which brings your friends together with the games you love, where you can invite a friend and start challenging gamers around the world, compete for top achievements, and race to the top of the leaderboard.


Since the launch at Google I/O, just over two months ago, over one thousand games have added Google Play game services, with millions of users enjoying features like leaderboards and multiplayer inside of the games they love. Some of those early developers using Google Play game services are reporting incredible upticks in vital engagement metrics; for instance, Concrete Software is seeing session length up 15%, and Glu is reporting a 40% increase in 7-day user retention.


Here are a few things you can do to take your game to the next level with Google Play:


  • Integrate with Play Games using achievements and leaderboards to activate your players.

  • Add real-time multiplayer to competitive and cooperative games and increase engagement.

  • Use Play Games branding guidelines and create rich visuals that bolster your presence in the Google Play Games app.


Whether it be getting your app ready for the wave of new Android tablets that are lighting up each day, or opening up a whole new set of features for your users with Google Play game services, a great Android experience starts with a great app or game. That’s why we’re working hard to help provide you with the tools and features needed to create those great experiences for your users, and to help you reach as many of them as possible in the process, with Google Play.


Wednesday, July 24, 2013

Posted by Dave Burke, Engineering Director, Android Platform


Today in San Francisco we announced Android 4.3, a sweeter version of Jelly Bean that includes great new features for users and developers. Android 4.3 powers the new Nexus 7 tablet that's coming soon to Google Play and retail outlets, and it’s rolling out now as an update to Nexus 4, Nexus 7, Nexus 10, and Galaxy Nexus HSPA+ devices across the world.


For developers, Android 4.3 includes the latest performance enhancements to keep your apps fast, smooth, and efficient, together with new APIs and capabilities to use in your apps. Here's a taste of what's new:


  • OpenGL ES 3.0 — Game developers can now take advantage of OpenGL ES 3.0 and EGL extensions as standard features of Android, with access from either framework or native APIs.

  • Bluetooth Smart — Now your apps can communicate with the many types of low-power Bluetooth Smart devices and sensors available today, to provide new features for fitness, medical, location, proximity, and more.

  • Restricted profiles — Tablet owners can create restricted profiles to limit access to apps, for family, friends, kiosks, and more. Your app can offer various types of restrictions to let tablet owners control its capabilities in each profile.

  • New media capabilities — A modular DRM framework enables media application developers to more easily integrate DRM into their own streaming protocols such as MPEG DASH. Apps can also access a built-in VP8 encoder from framework or native APIs for high-quality video capture.

  • Notification access — Your apps can now access and interact with the stream of status bar notifications as they are posted. You can display them in any way you want, including routing them to nearby Bluetooth devices, and you can update and dismiss notifications as needed.

  • Improved profiling tools — New tags in the Systrace tool and on-screen GPU profiling give you new ways to build great performance into your app.


Check out the Android 4.3 platform highlights for a complete overview of what’s new for developers. To read more about the new APIs and how to use them, take a look at the API Overview or watch the new DevBytes videos.


Along with the new Android 4.3 platform we’re releasing an update to the Android NDK (r9). The new NDK gives you native access to the OpenGL ES 3.0 APIs and other stable APIs in Android 4.3, so if you use high-performance graphics in your games or apps, make sure to check it out.


Last, we’ve updated the Android Support Library (r18) with several key APIs to help you build great apps with broad compatibility. Most important, we've added an Action Bar API to let you build this essential Android design pattern into your app with compatibility back to Android 2.1. For apps targeting RTL languages, there's a new BidiFormatter utility you can use to manage RTL strings with compatibility back to Android 2.1. Also, watch for a new RenderScript feature coming soon that will let you take advantage of hardware-accelerated computation with compatibility back to Android 2.2.


You can get started developing and testing on Android 4.3 right away, in Android Studio or in ADT/Ant. You can download the Android 4.3 Platform (API level 18), as well as the SDK Tools, Platform Tools, and Support Library from the Android SDK Manager.

Friday, July 19, 2013

Posted by Roman Nurik, Android Developer Relations


For most users, the launcher icon (sometimes referred to as the app icon) is the first impression of your app. As higher density screens on both phones and tablets gain popularity, it's important to make sure your launcher icon is crisp and high quality. To do this, make sure you’re including XHDPI (320dpi) and XXHDPI (480dpi) versions of the icon in your app.

In addition to the current launcher icon guidelines, please also refer to these additional important guidelines when creating your icons:

  • Launcher icons are 48dp square and should be provided for MDPI, HDPI, XHDPI, and XXHDPI densities—at the very least XHDPI and XXHDPI.

  • The 512px Google Play listing icon should have the same content as the launcher icon, except for minor additional badging.

  • Launcher icons should be designed specifically for Android. As per the Pure Android design guidelines, avoid mimicking visual elements and styles from other platforms.

  • Launcher icons should be three-dimensional, front view, with a slight perspective as if viewed from above, so that users perceive some depth.

  • Launcher icons should have a distinct silhouette, meaning that you should avoid simple square/circle icons and instead opt for unique shapes.

  • Launcher icons should be simple at the macro level but still detailed at the micro level (e.g. include subtle edge effects, gradients and textures).

  • Launcher icons should employ lightweight background protection such as a subtle drop shadow, but it should not be too dark or visually prominent.

  • Launcher icons should include between 0dp and 3dp of padding. Vary the padding for optical alignment and weight normalization purposes (e.g. thinner icons can use smaller padding and thicker icons can use less padding for a more consistent icon mass across icons).

Note that tablets and other large screen devices request a launcher icon that is one density size larger than the device's actual density, so you should provide your launcher icon at the highest density possible. For example, if a tablet has an XHDPI screen, it will request the XXHDPI version of the launcher icon.

Tuesday, July 9, 2013

Posted by Reto Meier, Android Developer Relations Tech Lead


The 2013 mid-year Android Developer Survey is now open!


Last year more than 5,000 of you shared your Android Development experiences and challenges with us, and your responses directly influenced our choices and priorities for building things like Android Studio, the new Google Play Publishing Console, and the Google Play services.


We in the Android Developer Relations team are passionate about making Android app development a great experience, so we're once again asking all of you involved in developing Android apps - engineers, designers, product managers, and distribution and support folks - to let us know what you think.


We want to better understand the challenges you face when planning, designing, writing, distributing, and monetizing your Android apps, so we've put together this brief (15-20min) survey that will help us create better tools and resources for you.


In an effort to get a better representation of developers from around the world the survey is available in the following languages:


Last year you told us you'd like a way to give us general written feedback, so to facilitate this while keeping the survey short and simple, we've included a link at the end of the survey that will let you send us as much direct feedback as you care to, completely anonymously.


Of course, you can always send us your thoughts, questions, suggestions, and complaints any time by posting to us (publicly or privately) on Google+ at +Android Developers or using the hash tag #AndroidDev.


As always, we're looking forward to hearing your thoughts!

Wednesday, July 3, 2013

Posted by Marco Paglia, Android Design Team

Attention to detail makes an app truly beautiful: transitions are fast and clear, layout and typography are crisp and meaningful, and design touches that delight you in surprising ways are sprinkled throughout. Today, we’re publishing a new Beautiful Design collection on Google Play, which highlights 11 beautiful apps with these kinds of masterfully crafted design details.

The collection, which we’ll refresh with new apps every so often, currently includes:

  • Pattrn (by Lucas Rocha), a beautifully focused app for discovering and sharing unique wallpapers on any size screen device.

  • Pocket (by Read It Later), an article keeper and reader app with a beautiful queue browsing interface and a remarkably comfortable and pleasing reading experience on phones and tablets.

  • Timer (by Opoloo), a timer app with an elegant and deeply satisfying timer-creation interface and simple, beautiful theme choices.

  • Eye in Sky Weather, NY Times, Grand St., Pinterest, Press, Expedia, Flipboard and TED… each with delightful design details.

If you’re an Android developer, make sure to play with some of these apps to get a sense for the types of design details that can separate good apps from great ones.

Lastly, remember that this new Beautiful Design collection is just one of a number of unique collections on Google Play that are front and center in the new Google Play Store app client.

Wednesday, June 26, 2013

Posted by Sachin Kotwani, Google Cloud Platform team

Android Studio lets you easily add a cloud backend to your application, right from your IDE. A backend allows you to implement functionality such as backing up user data to the cloud, serving content to client apps, real-time interactions, sending push notifications through Google Cloud Messaging for Android (GCM), and more. Additionally, having your application’s backend hosted on Google App Engine means that you can focus on what the cloud application does, without having to worry about administration, reliability or scalability.


When you create a backend using Android Studio, it generates a new App Engine application under the same project, and gives your Android application the necessary libraries and a sample activity to interact with that backend. Support for GCM is built-in, making it easy to sync data across multiple devices. Once you've generated the project, you can build and run your client and server code together, in a single environment, and even deploy your backend code right from Android Studio.


In this post we’ll focus on how to get started with the basic setup. From there it's easy to extend the basic setup to meet your needs.


Preliminary setup


Before you get started, make sure you take care of these tasks first:


  • Download Android Studio if you haven’t done so already and set it up.

  • Make sure you have an application project set up in Android Studio. You can use any working app that you want to integrate with your backend, even a sample app.

  • If you'll be running the app on an emulator, download the Google APIs Addon from the SDK Manager and run your app on that image.


  • Create a Google Cloud Platform project: In the Cloud Console, create a new project (or reuse an old one) and make note of the Project ID. Click on the words “Project ID” on the top left to toggle to the Project Number. Copy this as well.

  • Enable GCM and obtain API Key: In the Cloud Console, click on APIs and turn on the Google Cloud Messaging for Android API. Then, click on the “Register App” button on the top left, enter a name for the app, then select “Android” and “Accessing APIs via a web server”. In the resulting screen, expand the “Server Key” box and copy the API key.


1. Generate an App Engine project


In Android Studio, open an existing Android application that you want to modify, or create a new one. Select the Android app module under the Project node. Then click Tools > Google Cloud Endpoints > Create App Engine Backend.


In the wizard, enter the Project ID, Project Number, and API Key of your Cloud project.


This will create:


  • An App Engine project which contains the backend application source

  • An endpoints module with a RegisterActivity class, related resources, and client libraries for the Android app to communicate with the backend


The generated App Engine application (<app_name>-AppEngine) is an Apache Maven-based project. The Maven pom.xml file takes care of downloading all the dependencies, including the App Engine SDK. This module also contains the following:


  • A Google Cloud Endpoint (DeviceInfoEndpoint.java, auto-generated from DeviceInfo.java) that your Android app will “register” itself through. Your backend will use that registration info to send a push notification to the device.

  • A sample endpoint, MessageEndpoint.java, to list previously sent GCM messages and send new ones.

  • A starter web frontend application (index.html in webapp directory) that will show all the devices that have registered with your service, and a form to send them a GCM notification.


The endpoints module (<app_name>-endpoints) generated for you contains the classes and libraries needed by the Android application to interact with the backend:


  • A RegisterActivity.java class that, when invoked, will go through the GCM registration flow and also register itself with the recently created backend through DeviceInfoEndpoint.

  • Client libraries, so that the application can talk to the backend using an object rather than directly using raw REST calls.

  • XML files related to the newly created activity.


2. Add GCM registration to your app


In your Android application, you can call RegisterActivity whenever you want the registration to take place (for example, from within the onCreate() method of your main activity.


...
import android.content.Intent;
...

@Override
protected void onCreate(Bundle savedInstanceState) {
...
Intent intent = new Intent(this, RegisterActivity.class);
startActivity(intent);
}


3. Deploy the sample backend server


When you're ready to deploy an update to your ( the sample ) production backend in the cloud, you can do that easily from the IDE. Click on the “Maven Projects” button on the right edge of the IDE, under Plugins > App Engine, right-click and run the appengine:update goal.


As soon as the update is deployed, you can also access your endpoints through the APIs Explorer at http://<project-id>.appspot.com/_ah/api/explorer.


For testing and debugging, you can also run your backend server locally without having to deploy your changes to the production backend. To run the backend locally, just set the value of LOCAL_ANDROID_RUN to true in CloudEndpointUtils.java in the App Engine module.


4. Build and run the Android app


Now build and run your Android app. If you called RegisterActivity from within your main activity, the device will register itself with the GCM service and the App Engine app you just deployed. If you are running the app on an emulator, note that GCM functionality requires the Google APIs Addon image, which you can download from the SDK Manager.


You can access your sample web console on any browser at http://<project-id>.appspot.com. There, you will see that the app you just started has registered with the backend. Fill out the form and send a message to see GCM in action!


Extending the basic setup


It's easy to expand your cloud services right in Android Studio. You can add new server-side code and through Android Studio instantly generate your own custom endpoints to access those services from your Android app.


Monday, June 24, 2013

Posted by Pratip Banerji, Google Play for Education team


Last month, we announced Google Play for Education — a platform enabling developers and content providers to reach K-12 educators and students in the United States through a new Android based initiative. Google Play for Education is an extension of the Google Play Store for schools, adding curation, bulk purchasing, and instant distribution to students’ Android tablets for educational apps, books and videos. As we said at the time, we are excited to be doing our part to make technology and innovation in the classroom more accessible.


Starting today, you can use the Google Play Developer Console to mark your apps for inclusion in Google Play for Education, which is actively being piloted in schools across the country. Marking your app identifies it as targeted for the US K-12 educational market and queues it for evaluation by a third-party network of educators. These educators perform a first-pass qualification of apps, assigning the appropriate subject, grade, and common core standards metadata, while evaluating whether they meet the Google Play for Education criteria for classroom use.


Leading up to the fall launch, the Google Play for Education team is conducting an extensive series of pilots that include schools and students across the U.S. By marking your app for inclusion now, you will be getting your app into the hands of these schools and key influencers in the education technology community.


Whether you already have an existing educational app or are looking to build one, take a look at our Guidelines for Apps to make sure your app is appropriate for the K-12 environment. Follow our detailed requirements and test your app to ensure it is optimized for Android tablets. Then, upload your new or updated app, mark it for inclusion in Google Play for Education, and publish. We will email you when your app has been evaluated. Depending on app submission volume, this process can take 3-4 weeks. For more information, see Get Started.


Also please tune in to our panel for education developers on Tuesday June 25th at 10:30 AM EDT. Live from the ISTE (the International Society for Technology in Education) Conference, we’ll tell you more about developing for Google in Education and we’ll host some educators who explain what they are looking for in educational apps. The panel will be streamed on Google Developers Live and we'll make the video available to you as well.


For more information on Google Play for Education, please visit developer.android.com/edu.

Thursday, June 6, 2013

checkup_droid


Posted by Ellie Powers, Google Play team


Google Play gives you tons of options on publishing your apps and connecting with users. But as you get started with new features like beta testing and staged rollouts, it’s a good idea to do a checkup and make sure you’ve covered the basics.


1. Boost your developer account security


  • If you take just one step today to protect your Google Play apps, enable two-step authentication for your Google account, and encourage the rest of your team to do the same.

  • Next, many developers first set up their Google Play account with their personal gmail account, but it’s actually a good idea to transfer your apps to a separate account. All of your installations and reviews remain intact. If you haven’t done this already, transfer your apps to a new account today.

  • Don’t share passwords. Instead, add each individual who needs access and only grant the minimum level of access they need — and encourage them to enable two-step authentication.

  • Review the list of people with access regularly, and when people leave your project, make it a standard practice to remove their access. Learn more about developer account security.


2. Protect your keystore


In order to publish an update to an existing app, you’ll need to sign it with the same keystore every time. If you lose your keystore, you’ll lose your history and reviews, so you’ll need to start over with new apps with new package name and a new key, so you’ll want to make sure you protect it. First, choose a secure password, and don’t use the same password that you use for your Google account. Next, back up your keystore somewhere, but don’t upload it to Google Drive with an account you use to publish on Google Play.


3. Check your email addresses


As a developer, you are responsible for checking two important email addresses:


  • Account owner email address: Google uses the address used to register your Developer Console to contact you about your apps and account, so it is extremely important that someone is responsible for checking it regularly. If necessary, you can forward messages from this account via Gmail, or transfer your apps to another account.

  • Customer support email address: For each individual application, you can specify the best way for users to contact you for customer support. Ensure that a valid support email address for your product is specified. As a best practice, this should probably be a designated support account that is checked regularly and not the same email as the address used to login to the Developer Console.


4. Familiarize yourself with the policies


We recently launched some new guides and examples for Google Play’s Developer Program Policies and Developer Distribution Agreement. Note that once you publish an app as free, you can’t change it to a paid app later, though you can add in-app products.


5. Set up team processes


You may have many people involved with your Google Play apps. Make sure roles are clear in terms of whose job it is to publish updates, check statistics and optimization tips, read and reply to user reviews, and track revenue. Make sure all of these people have the right access to the Developer Console. Many developers who are part of larger organizations also report to their larger teams about their apps’ performance. Designate someone to make sure your app description, graphics (including localized and tablet screenshots), and pricing are up to date.


6. Configure your Developer Console UI languages


To change the language you want to see the Developer Console in, set your primary language. If you speak additional languages, configure those, too — user reviews in those languages won’t be translated automatically in the Developer Console. That was a popular request from developers.


7. Refresh your app’s marketing materials


8. Stay on top of developer news


To make sure you’re aware of the latest Google Play updates for developers, make sure you check the Android Developers blog regularly, follow +Android Developers, and check the Developer Console regularly for announcements.


Monday, June 3, 2013

Posted by Brad Abrams, Product Manager, Google Cloud Platform

Many of the best mobile app experiences are powered by services in the cloud. Top Android developers such as Pulse and SongPop have long taken advantage of the convenience and scalability of Google's cloud platform in their businesses. Now with the Mobile Backend Starter, it's even easier to add cloud services to your apps.


Mobile Backend Starter


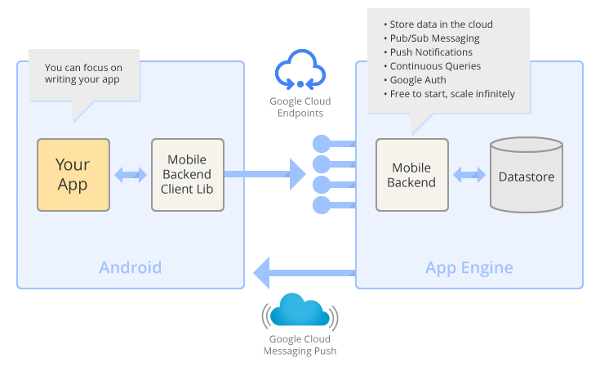
Mobile Backend Starter is a one-click deployable, complete mobile backend that allows you to reap the benefits of a cloud backend with none of the headaches. It provides a ready-to-deploy, general purpose cloud backend and a general purpose client-side framework for Android.


Mobile Backend Starter gives you everything you need to rapidly set up a backend for your app, without needing to write any backend code. It includes a server that stores your data with App Engine and a client library and sample app for Android that make it easy to access that data. You can also add support for Google Cloud Messaging (GCM) and continuous queries that notify your app of events you are interested in. To keep user data secure, Mobile Backend Starter also includes built-in support for Google Authentication.


Features of Mobile Backend Starter include:


  • Cloud data storage: Users change devices and increasingly use multiple devices. Store any amount of data per user in the cloud to be accessed from anywhere.

  • Pub/Sub messaging: Send messages from one device, to any or all other devices. You can easily use 1:1 and 1:many messaging as well as broadcasting. This feature is useful for various applications including social apps, forums, chat, gaming, and group collaborations.

  • Push notifications: Data updated on one device is automatically available on all devices with GCM for Android.

  • Continuous queries: Create queries that run continuously on the server, automatically feeding updates to the client. These queries are powered by Prospective Search.

  • Google authentication and authorization: Keep data isolated per user or shared among users.

  • Free to get started, scales with your needs: You can start by handling hundreds of users for free, then grow to any scale.


Quick setup and integration


You can set up and run the Mobile Backend Starter in just few steps:


  1. First, go to the Google Cloud Console, and create a project. Then click Deploy.

  2. Click on Settings to go to the admin control panel for your new backend. Under Authentication / Authorization, select "Open (for development use only)" and save the changes.


  3. Next, download the Android client project and open it up in your Android IDE. Locate the Consts.java file and set the PROJECT_ID to the Project ID of the project you created in the Google Cloud Console.

  4. Now just build and run the Android application and you have a cloud enabled Android application.


Check out the complete docs for details on setup as well as information on how to enable authentication, send push notifications, and use standing queries.


The best part is you can download the complete source code of the backend on GitHub and customize it however you want to meet your needs.


See Mobile Backend Starter in action at Google I/O


To see Mobile Backend Starter in action, check out our talk at Google I/O 2013 (embedded below) called "From Nothing to Nirvana in Minutes: Cloud Backend for Your Android Application". The talk shows how to use Mobile Backend Starter to create a new backend server and integrate it with an Android app via Google Cloud Endpoints and the Google Plugin for Eclipse.


We look forward to hearing your questions and learning about the amazing applications you have built. You can find us lurking on the Cloud Endpoints StackOverflow forum.


Thursday, May 30, 2013

Posted by Reto Meier, Android Developer Relations Tech Lead


We had a lot to talk about this year at I/O. We launched Google Play services 3.1 with Google Play games services, improved Location APIs, and Google Cloud Messaging enhancements; Android Studio: A new IDE for Android development based on IntelliJ IDEA Community Edition; and Google Play Developer Console improvements such as app translation service, revenue graphs, beta testing & staged rollouts, and optimization tips.


With the excitement of these announcements behind us, it's time to sit back, relax, and watch all the sessions we missed during the event. To make that easier, we've collected all the Android sessions together in the Android @ Google I/O 13 page on the developer site.


We've also created the Google I/O 13 - The Android Sessions playlist (embedded below), as well as playlists for each developer category: design, develop, and distribute.


For those of you who prefer listening to your I/O talks without the distraction of watching speakers and slides, we're also making the sessions available as part of the Android Developers Live Podcast.


Google I/O is always a highlight on the Android Developer Relations team's calendar, so we'll be keeping the magic alive with our Android Developers Live broadcasts.


This week we resumed our regular broadcasts with Android Design in Action offering a review of Android Design sessions at I/O. Next week will see the return of This Week in Android Development and The App Clinic, and stay tuned for more episodes of Table Flip, GDG App Clinics, and more!


We'll also continue to add new DevBytes and BizDevBytes to offer tips and tricks for improving your apps and making them more successful.


As always you can talk to us and keep track of our upcoming broadcasts, Android Studio news, and other Android developer news on the +Android Developers Google+ page.


Wednesday, May 29, 2013

Posted by Dirk Dougherty, Android Developer Relations

One of the things users like most about Android is the flexibility to choose which apps should handle common tasks on their devices — from opening a web page or sending an SMS to playing a music file, taking a picture, or making phone calls. This flexibility is provided by Intents.


Intents give you a powerful way to integrate your apps deeply into the system — users can even choose to let your apps replace functionality provided by system apps. In those cases, it’s essential to make sure that anything your app can’t or doesn’t handle can still be handled properly by the default system app.


Proper implementation and testing are especially important for apps that provide telephony services. Make sure that your app doesn't interfere with emergency calling by listening for the wrong intent — CALL_PRIVILEGED. Follow the best practices below to handle outgoing calls the right way, using the NEW_OUTGOING_CALL intent.


Listening for outgoing call requests


Apps that provide phone calling services (such as VOIP or number management) can set up Intent filters to handle outgoing call requests, such as those made from the Dialer or other installed apps. This provides a seamless integration for the user, who can transition directly to the calling service without having to redial or launch another app.


When the user initiates a call, the system notifies interested apps by sending an ordered broadcast of the NEW_OUTGOING_CALL Intent, attaching the original phone number, URI, and other information as extras. This gives apps such as Google Voice and others a chance to modify, reroute, or cancel the call before it’s passed to the system’s default phone app.


If you want your phone calling app to be able to handle outgoing call requests, implement a broadcast receiver that receives the NEW_OUTGOING_CALL Intent, processes the number, and initiates a call as needed. Make sure to declare an intent filter for NEW_OUTGOING_CALL in the receiver, to let the system know that your app is interested in the broadcast. You’ll also need to request the PROCESS_OUTGOING_CALLS permission in order to receive the Intent.


Note that the system broadcasts NEW_OUTGOING_CALL only for numbers that are not associated with core dialing capabilities such as emergency numbers. This means that NEW_OUTGOING_CALL can not interfere with access to emergency services the way your use of CALL_PRIVILEGED might.


Here’s an example broadcast receiver declared in an app’s manifest file:


<manifest>
<uses-permission android:name="android.permission.PROCESS_OUTGOING_CALLS" />
<application>
...
<receiver android:name=MyOutgoingCallHandler">
<intent-filter>
<action android:name="android.intent.action.NEW_OUTGOING_CALL" />
<category android:name="android.intent.category.DEFAULT" />
</intent-filter>
</receiver>
...
</application>
</manifest>


The implementation of the corresponding broadcast receiver would look something like this:


public class MyOutgoingCallHandler extends BroadcastReceiver {
@Override
public void onReceive(Context context, Intent intent) {
// Extract phone number reformatted by previous receivers
String phoneNumber = getResultData();
if (phoneNumber == null) {
// No reformatted number, use the original
phoneNumber = intent.getStringExtra(Intent.EXTRA_PHONE_NUMBER);
}
// My app will bring up the call, so cancel the broadcast
setResultData(null);
// Start my app to bring up the call
...
}
}


Because the NEW_OUTGOING_CALL broadcast is ordered, your app can choose whether to consume the call request itself or simply process the number and pass the result data on to other apps that may be interested. In this example, the broadcast receiver brings up a phone call on it’s own service and sets the result data to null. This prevents the call request from reaching the default phone app.


An anti-pattern


Rather than listening for NEW_OUTGOING_CALL Intents, some apps have mistakenly set up intent filters for CALL_PRIVILEGED Intents as a way to handle outgoing calls. This is not a recommended approach, because the system may send a CALL_PRIVILEGED Intent for any number, including emergency numbers. Since non-system apps can’t reformat emergency numbers or place emergency calls, attempting to handle CALL_PRIVILEGED could inadvertently interfere with access to emergency numbers.


CALL_PRIVILEGED should only be used by apps that have the necessary signatureOrSystem-level permission — it is not designed for use by any third-party apps.


Check your apps for proper use of NEW_OUTGOING_CALL


If your app provides phone calling services and already uses intent filters to handle outgoing call requests, take a few minutes to make sure it is listening for the proper Intent: NEW_OUTGOING_CALL.


If your app includes intent filters that listen for CALL_PRIVILEGED Intents, make sure to remove those filters and related code from the app (in favor of NEW_OUTGOING_CALL) and publish the updated app as soon as possible.

Monday, May 20, 2013

Posted by Mark Thomas, Product Manager, Google Wallet


A key focus of Google Wallet is to simplify commerce for merchants and shoppers; for over a year now, consumers on Google Play have been using Wallet to make their purchases, to the benefit of the entire ecosystem. Helping merchants benefit from the growing consumer adoption of mobile commerce is where we believe we can make the most impact. And that’s why today we're focusing our efforts on the new Google Wallet Merchant Center and retiring Google Checkout over the next six months.


Most Google Play apps developers will seamlessly transition to the Wallet Merchant Center, which provides new reporting and analytics features and much more. A small number of Google Play developers, however, will see some changes:


  • Developers using Google Checkout on their website to sell physical goods or services will no longer be able to use Checkout after November 20, 2013. We have provided some discounted migration options to help with this change. If you are a U.S. merchant selling physical goods and services who does have payment processing, you can apply for Google Wallet Instant Buy, which offers a fast buying experience to Google Wallet shoppers.

  • Developers who use the Google Checkout for the Notifications and/or Order Reports API(s) will need to migrate to replacement APIs, made available through Google Play, before November 20, 2013. Watch for announcements on the new APIs soon.


If you sell apps or in-app products in Google Play, you’ll soon have access to the new Wallet Merchant Center. Watch for an email notifying you that that it’s now available to you. We expect to transition all merchants to the Wallet Merchant Center over the next several weeks.


We invite you to join us for our live merchant webinar on May 23, 2013 at 10AM PDT to learn more and ask any outstanding questions. As always, feel free to contact us at any time during this transition. Finally, be sure to check out the exciting updates launched last week at Google I/O (including Instant Buy and Wallet Objects) and stay tuned for more great developer features coming soon!

Friday, May 17, 2013

Posted by Ellie Powers, Google Play team


This week at I/O, we were excited to announce some updates to Google Play to help you optimize your business on Google Play: to help you take control of your app publishing, gain insight into your users, and expand your app’s success globally.


Play Store’s new view: apps designed for tablets


Many of you have invested in making great tablet experiences for your users, and we want to ensure that that work pays off and that users are able to discover great apps for their tablets. This week, the Google Play store began providing a view of our top charts highlighting apps which have been designed for tablets according to our tablet app quality checklist.


Be sure you don’t miss out! Check that your app’s optimization tips say that your app is designed for tablets, and upload tablet screenshots for 7” and 10” tablets.


Beta testing and staged rollouts


We have introduced support for beta testing and staged rollouts so that you can get feedback on your new app or app update early in its development and make sure your users are happy with the results. You can test two different versions on two different groups at the same time, such as testing a newer version with your employees first, and a more mature version with a group of external testers.


The beta testing is private on Google Play, and you can specify who gets these versions by adding Google Groups and Google+ Communities. Users give you feedback privately rather than through public reviews. When you’re satisfied that your new version is ready, you can now do a staged rollout to a percentage of your userbase. To give you more flexibility in light of beta testing and help get your whole team involved in the Developer Console, we will soon launch additional access controls.


Localization improvements


We’re collaborating with Google's internationalization team to make translating your app into new languages easier than ever. You can purchase professional translations of your apps from independent providers through the Google Play Developer Console. You can upload the strings you want translated, select the languages you want to translate into, and select your translation vendor based on time and price. If you’re interested in translating your apps with this feature, sign up to be a part of the preview in the Developer Console today on the APK page.


The new optimization tips for localization will help you identify new potential opportunities for global expansion based on popular languages for your app’s users and category. To fully localize your app into a language, you need to translate the strings in an APK, translate your Google Play store listing, and upload localized graphics. The optimization tips will also let you know if you’re missing any of these pieces.


New Analytics and monetization features


Getting better revenue and engagement data has been another key developer request, as developers told us that they check their revenue and stats constantly. New revenue charts in the Developer Console allow you to see your app’s daily revenue and summary figures, and you can filter the data by country. Coming soon, Google Play and Google Analytics are teaming up to bring you better insight into your users. Google Analytics will start showing Google Play views and installs for each campaign, while Google Play will show Google Analytics engagement metrics.


For those of you using in-app billing, we’ve heard your feedback and made some improvements to reduce your development time and costs. Your test accounts will now able to make in-app test purchases without those transactions actually being charged, but everything else works the same as it would for a real user.


In a few weeks, we will launch a new Order Status API, which allows you to verify the status of an in-app order from your servers. We will also be launching a tool for automating downloads of financial reports. Finally, the new Google Wallet Merchant Center is continuing to roll out with enhanced reporting, additional analytics and many other enhancements.


Google Play for Education coming soon


You'll soon be able to offer apps to schools through Google Play for Education, which launches later this year to K-12 schools in the United States. This online destination will allow schools to discover, purchase, and distribute apps to their students. Visit developer.android.com/edu to get started creating or optimizing your apps for schools today.


Thursday, May 16, 2013

Posted by Greg Hartrell, Angana Ghosh, Francesco Nerieri, Francis Ma, and the Google Play services team


Some of the most exciting Android announcements at Google I/O this year are part of our latest Google Play services release, version 3.1.


The new version brings you Google Play games services, part of a new cloud-integrated platform for social gaming based on Google+ identity. Also included are location-based services that make it easier to build efficient location-aware apps. For apps using the popular Google Cloud Messaging platform, you can now take advantage of XMPP messaging and easier setup. Finally, Cross-Platform Single Sign On for Google+ Sign-In is now available to your apps.


You can get started using these APIs and services right away—Google Play services 3.1 is already rolling out to Android devices across the world, with support reaching all the way back to Froyo.


Google Play games services


Games are always popular with Android developers, and the announcement of Google Play game services raised the volume even more.


Google Play games services lets you make your games more social, with achievements, leaderboards, and multiplayer, and they help you extend your user’s games across multiple devices by storing game saves and settings in the cloud.


Several great Android games are already using these new game services, including World of Goo, Super Stickman Golf 2, Beach Buggy Blitz, Kingdom Rush, Eternity Warriors 2, and Osmos.


You can take advantage of the new services right away using the games services SDK included in Google Play services. For all the details, check out the Google Play games services documentation.


Location APIs


If you build location-aware Android apps, you’ll want to check out the new location APIs. They make it easy to build accurate, fast, and efficient apps, with new contextual features.


The Fused Location Provider intelligently manages the underlying location technology and gives you the best location according to your needs. We’ve simplified the location APIs and completely rewritten our location algorithm to make location more accurate, flexible and use less battery.


Using the new geofencing API, your app can set up geographic boundaries around specific locations and then receive notifications when the user enters or leaves those areas.


With apps becoming increasingly contextual, understanding what the user is doing is critical to surfacing the right content. A new activity recognition API makes it easy to check the the user’s current activity — still, walking, cycling, and in-vehicle — with very efficient use of the battery. We use low-power sensors and machine-learning classifiers to recognize the activity, giving you both both high accuracy and low battery usage.


To learn more, head over to our training classes at Making Your App Location Aware or dive directly into the reference docs.


Google Cloud Messaging


We’ve added APIs to make it easier to set up GCM in your apps, and in the service itself we’ve added new messaging capabilities for your apps to use.


A new registration API lets your app register with the service using a single method call and begin receiving messages as soon as the call returns.


In the GCM service itself we’ve added support for messaging over XMPP with the new GCM Cloud Connection Server (CCS). Your servers now have a persistent connection over which to send large numbers of messages, very quickly, and with no overhead. New APIs in Google Play services let apps send messages back upstream to third-party servers using CCS, without needing to manage network connections. This helps keep battery and data usage to a minimum.


Also new in the GCM service is a User Notifications API. This new API lets you synchronize notifications across a user’s multiple devices — when the user dismisses a notification on one device, the notification disappears automatically from all the other devices. To get started with GCM, head over to the developer documentation.


Google+ Cross-Platform Single Sign On


Many people use apps on multiple devices throughout the day, switching between their laptops, tablets, and mobile devices. After signing-in to an app on one device, it’s natural that when they pick up a different device and use the same app, they would expect to be signed in there as well.


To help you provide this kind of seamless transition between platforms and stay connected with users across devices, we’re adding Cross-Platform Single Sign On to our Google+ Sign-In capabilities.


If your app is already using Google+ Sign-In, you’ve already got support for Cross-Platform Single Sign On. This feature will be enabled automatically over the coming days.


Cross-Platform Single Sign On gives you a great way to build longer-running, cross-platform user experiences, and it dovetails perfectly with the new Google Play games services for bridging game state across devices using the cloud.


To learn more about Google+ Sign-In, check out http://developers.google.com/+.


More About Google Play Services


Google Play Services is our platform for offering you better integration with Google products, and providing new capabilities to use within your apps. To learn more about Google Play services and the APIs available to you through it, visit the Google Services area of the Android Developers site.


UnOfficial Android Developers BlogThe owner of this website is a participant in the Amazon Services LLC Associates Program, an affiliate advertising program designed to provide a means for sites to earn advertising fees by advertising and linking to Amazon properties including, but not limited to, amazon.com, endless.com, myhabit.com, smallparts.com, or amazonwireless.com.